自我介绍
达老师,我负责后面阶段的内容。
我的素材全部是放在gitee上面。
视频是放在阿里云网盘的。
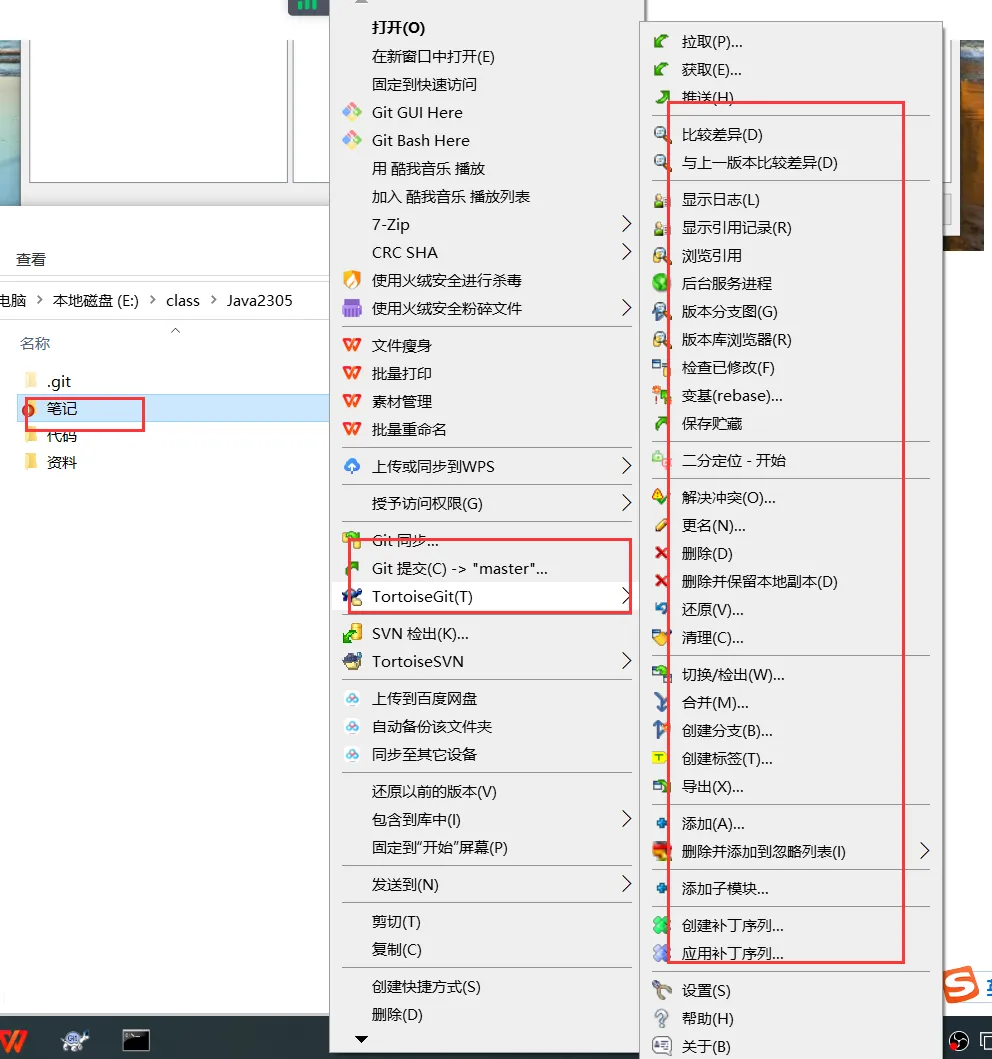
git客户端
之前我们操作git都是使用命令来完成的。
现在图形化界面的工具,它也可以操作git,它可以通过鼠标点击的方式来操作git,这是它的优点,可以提高效率。
这个工具叫做小乌龟。

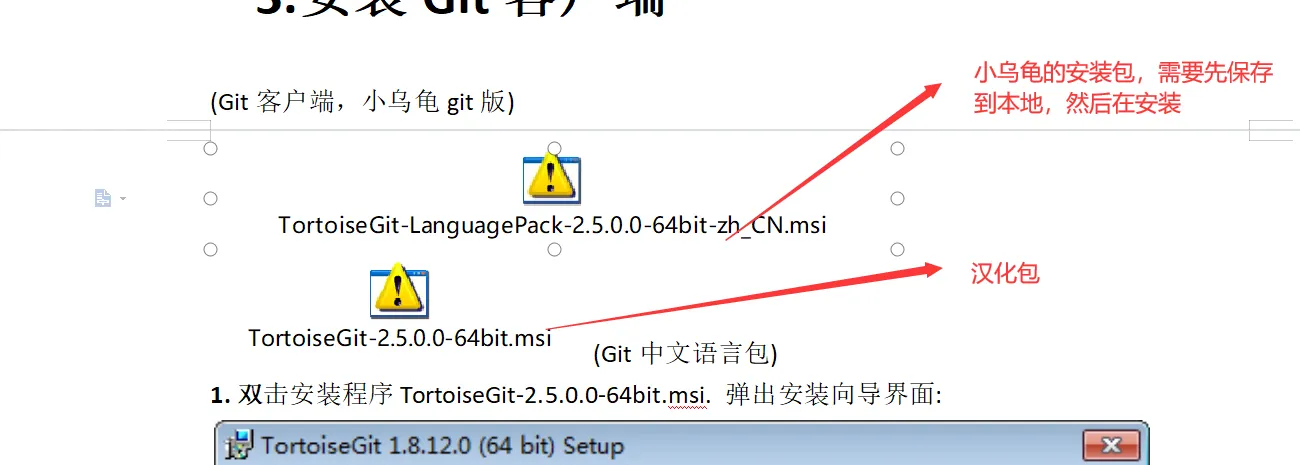
1、先把这个两个包安装包保存到本地
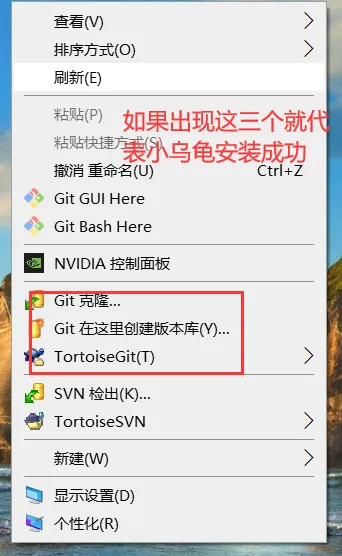
2、然后先安装小乌龟
3、小乌龟安装成功了以后再去安装汉化包
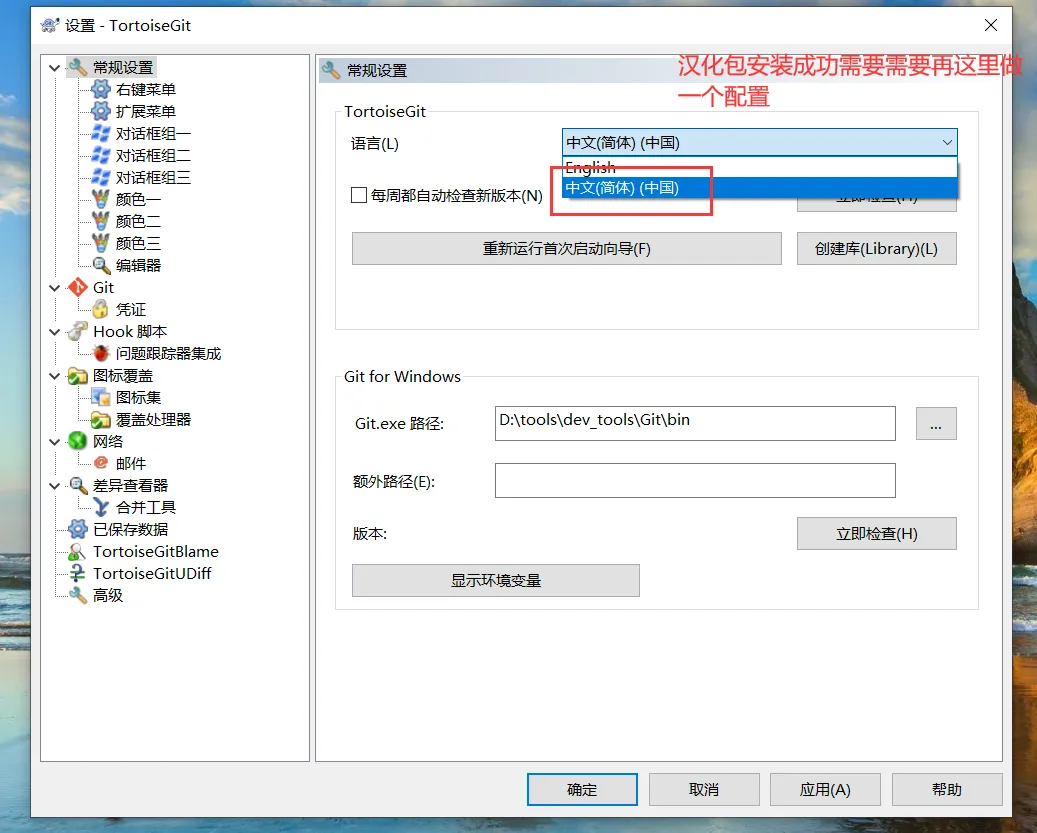
如果已经配置了中午还是显示的是英文,尝试把电脑重启下。
本地的仓库初始化
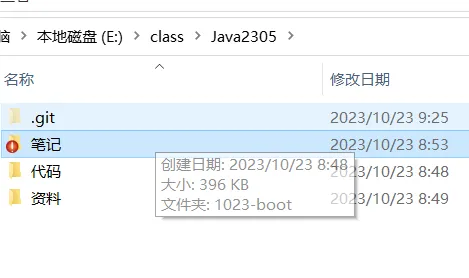
随便加点内容
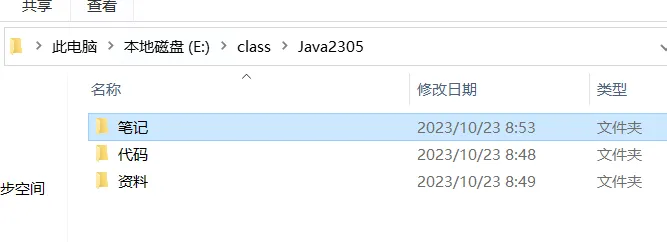
资料地址
gitee:https://gitee.com/dashixin.com/java2305
视频地址 https://www.aliyundrive.com/s/zMEdz7p7TVe
今日内容
画图
https://www.processon.com/view/link/6535d0f8d657a234397f8ea6
SpringBoot概念
1、提高了开发的效率
2、简化了配置
3、约定大于配置。
编码《配置《约定俗成
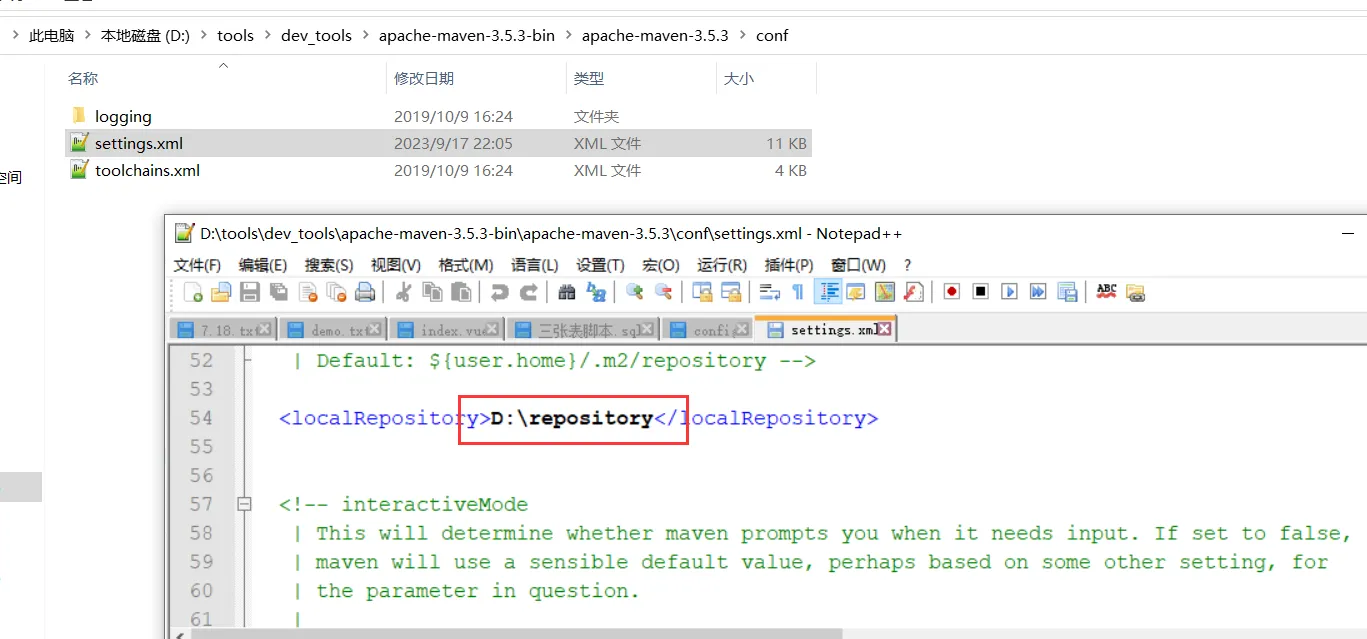
共享我的本地仓库

1、下载到本地
2、解压
3、把里面的所有的文件全部复制到你自己的本地仓库
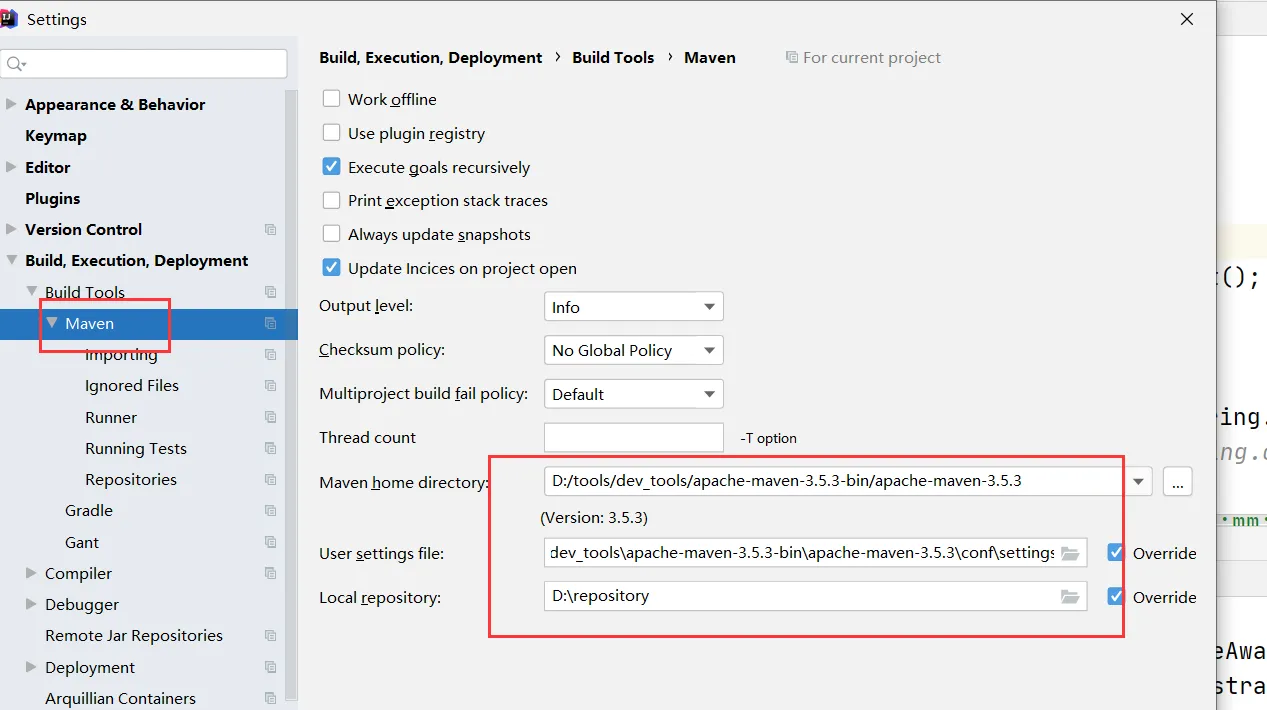
4、在maven的配置文件中设置一下本地仓库刚才下载的那个就可以了。
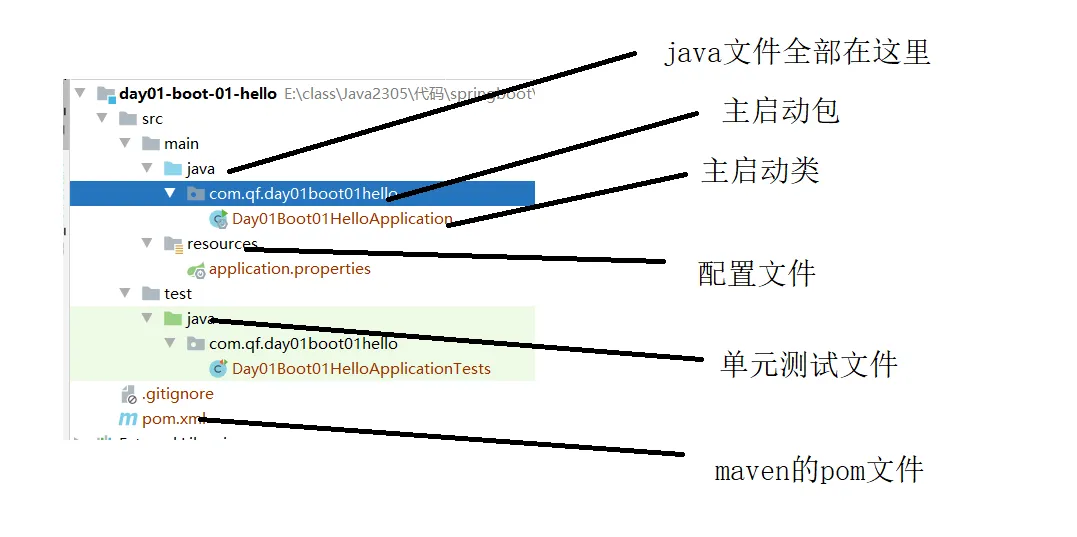
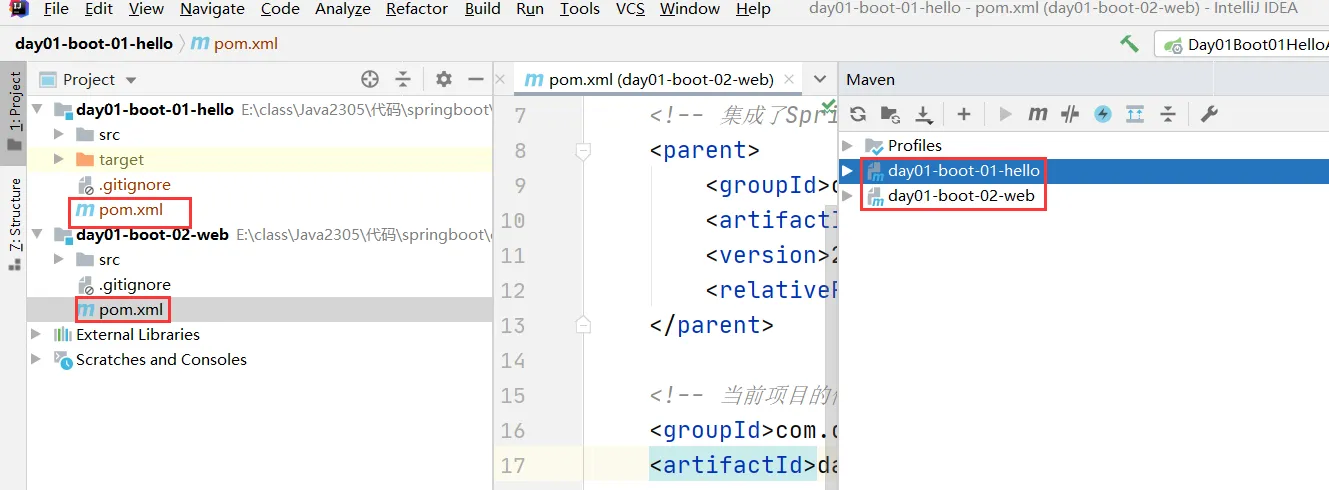
标准的springboot工程
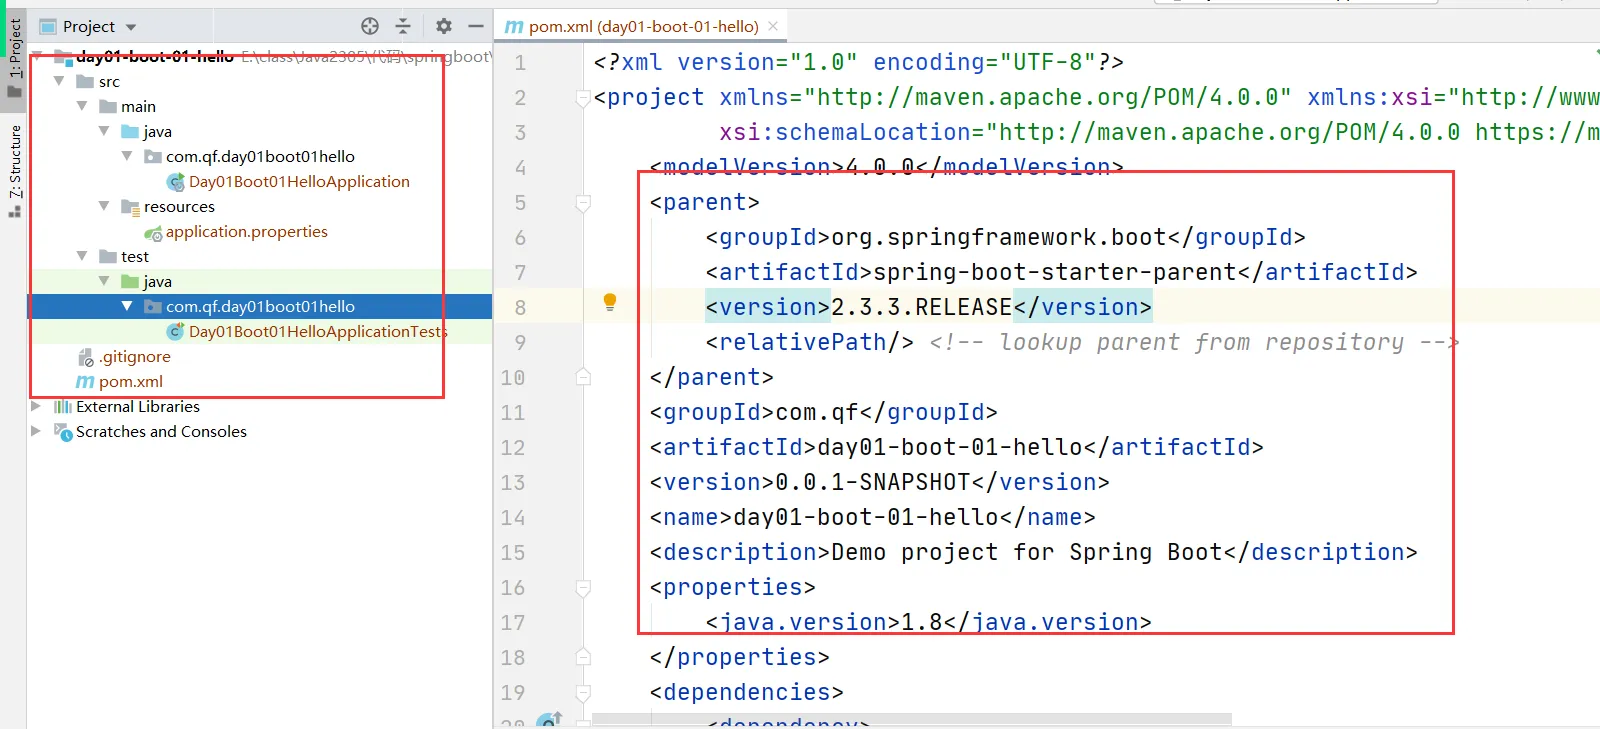
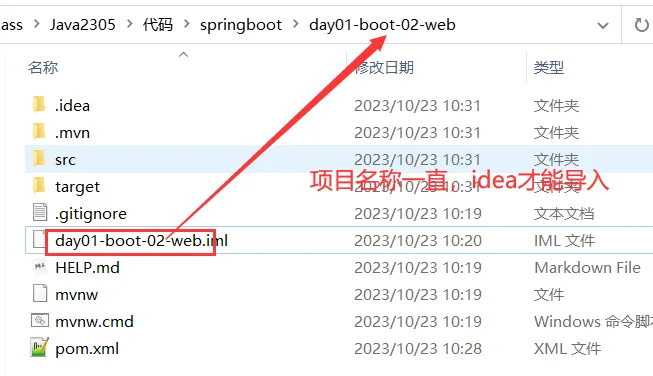
1、包名和类名中都包含了项目的名称
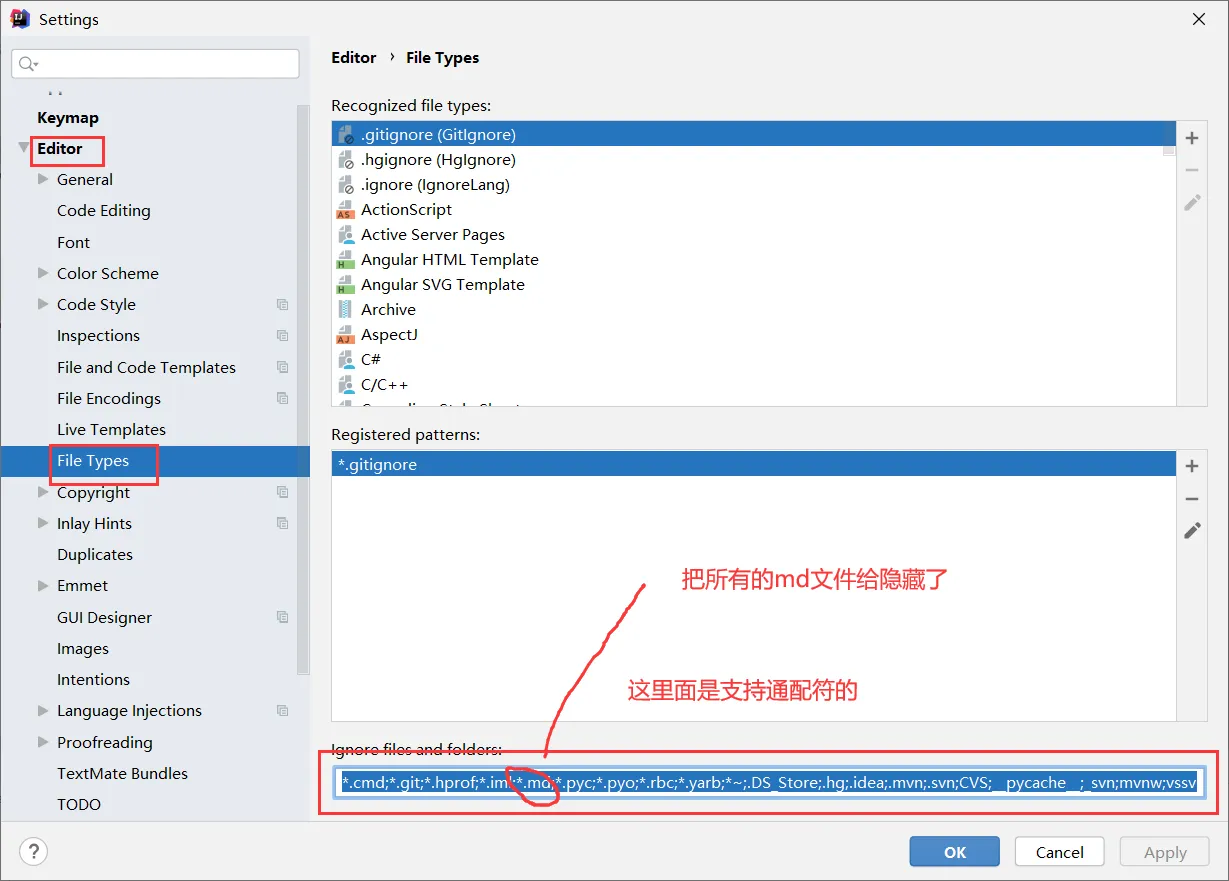
*.cmd;*.git;*.hprof;*.iml;*.md;*.pyc;*.pyo;*.rbc;*.yarb;*~;.DS_Store;.hg;.idea;.mvn;.svn;CVS;__pycache__;_svn;mvnw;vssver.scc;vssver2.scc;
优化POM.xml
我把不需要的东西全部删了
<?xml version="1.0" encoding="UTF-8"?>
<project xmlns="http://maven.apache.org/POM/4.0.0" xmlns:xsi="http://www.w3.org/2001/XMLSchema-instance"
xsi:schemaLocation="http://maven.apache.org/POM/4.0.0 https://maven.apache.org/xsd/maven-4.0.0.xsd">
<modelVersion>4.0.0</modelVersion>
<!-- 集成了SpringBoot的父工程 -->
<parent>
<groupId>org.springframework.boot</groupId>
<artifactId>spring-boot-starter-parent</artifactId>
<version>2.3.3.RELEASE</version>
<relativePath/> <!-- lookup parent from repository -->
</parent>
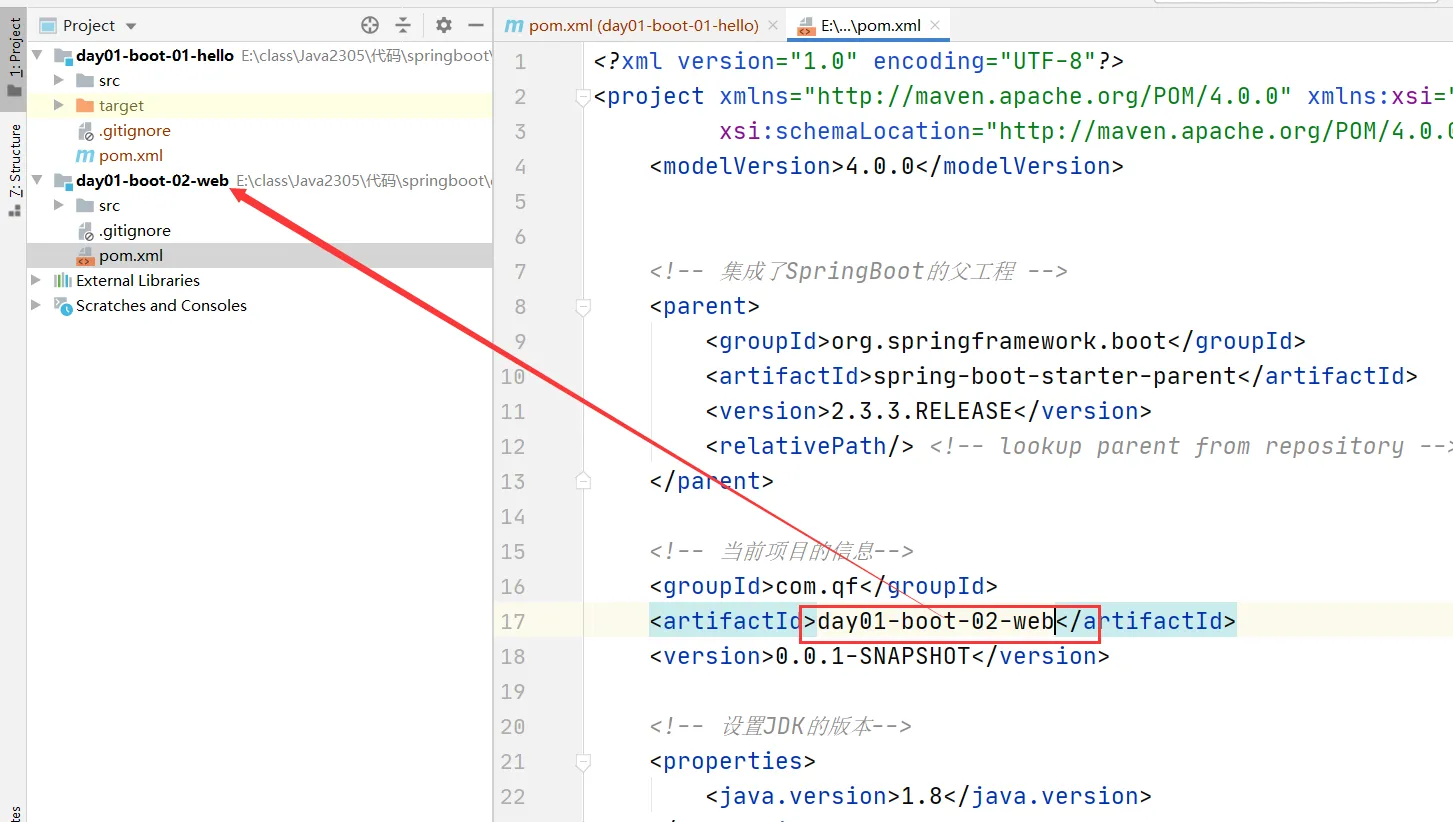
<!-- 当前项目的信息-->
<groupId>com.qf</groupId>
<artifactId>day01-boot-01-hello</artifactId>
<version>0.0.1-SNAPSHOT</version>
<!-- 设置JDK的版本-->
<properties>
<java.version>1.8</java.version>
</properties>
<!-- 管理项目的依赖-->
<dependencies>
<dependency>
<groupId>org.springframework.boot</groupId>
<artifactId>spring-boot-starter</artifactId>
</dependency>
<dependency>
<groupId>org.springframework.boot</groupId>
<artifactId>spring-boot-starter-test</artifactId>
<scope>test</scope>
</dependency>
</dependencies>
<!-- 配置sprigboot插件-->
<build>
<plugins>
<plugin>
<groupId>org.springframework.boot</groupId>
<artifactId>spring-boot-maven-plugin</artifactId>
</plugin>
</plugins>
</build>
</project>
优化包结构
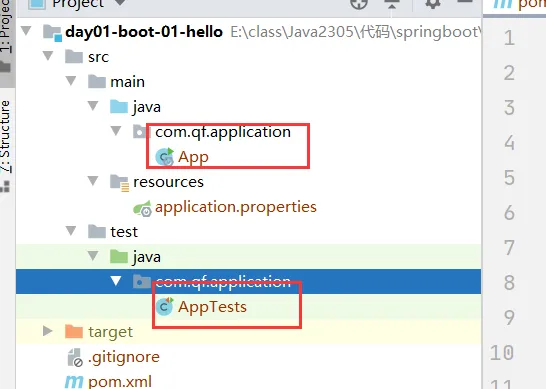
com.qf.项目名称。
如果没有项目就用application代替
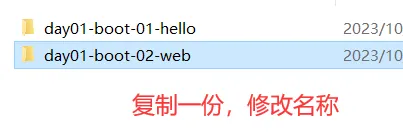
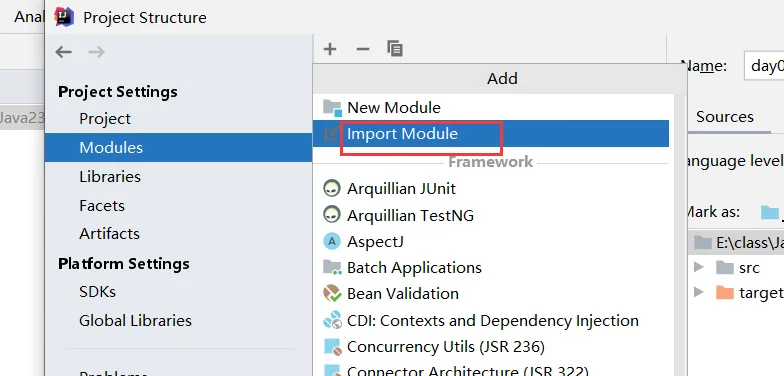
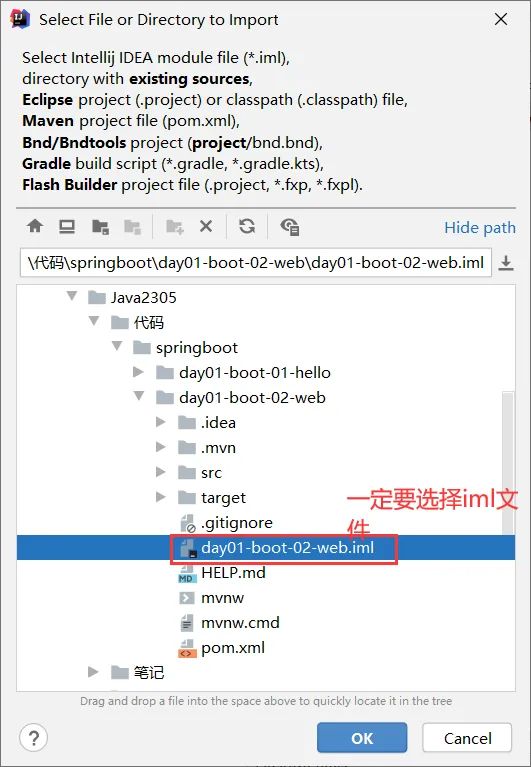
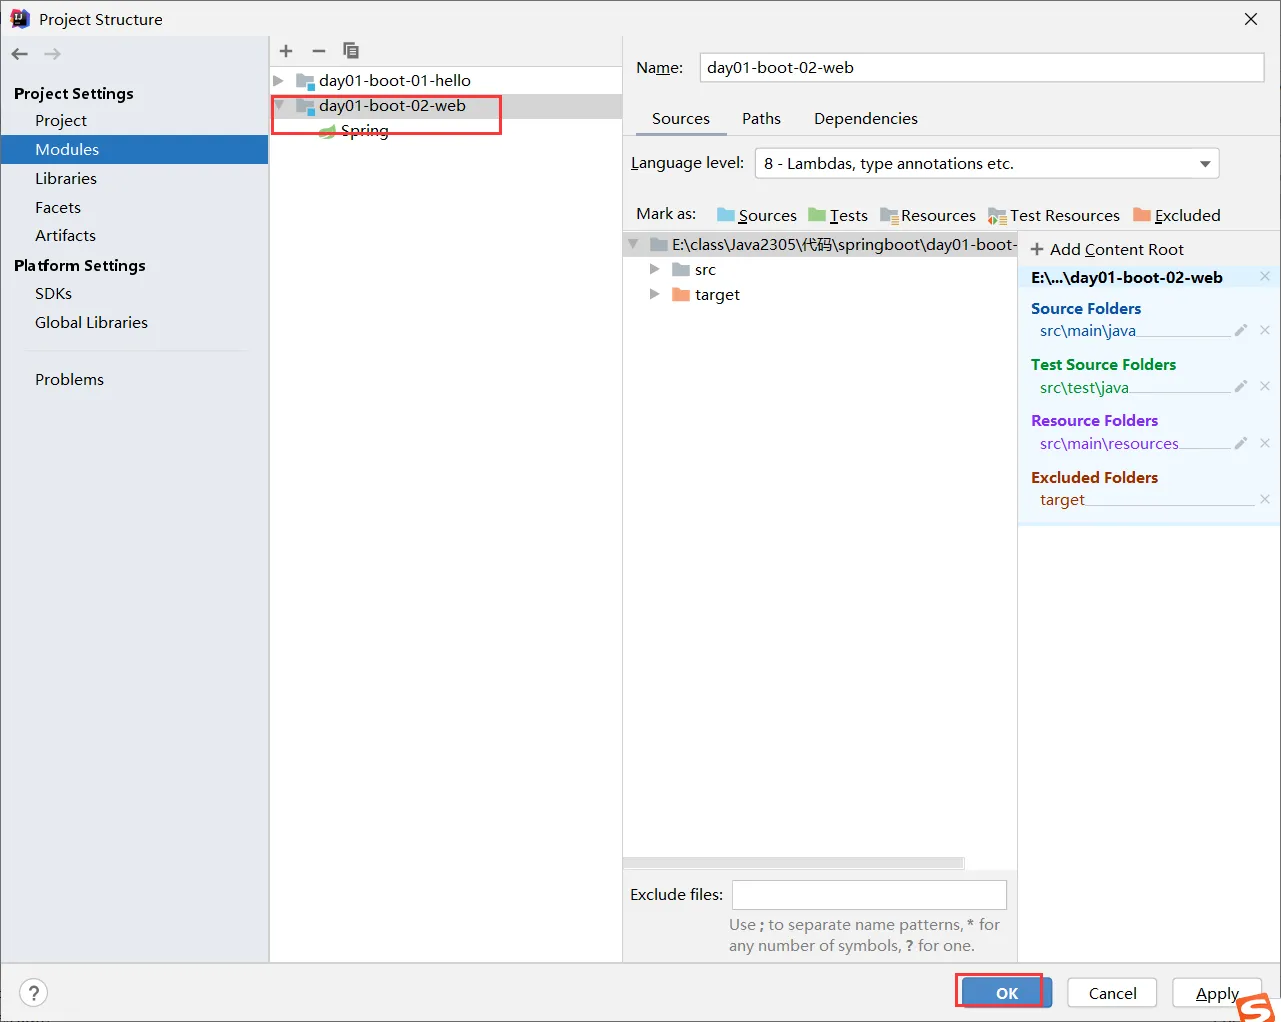
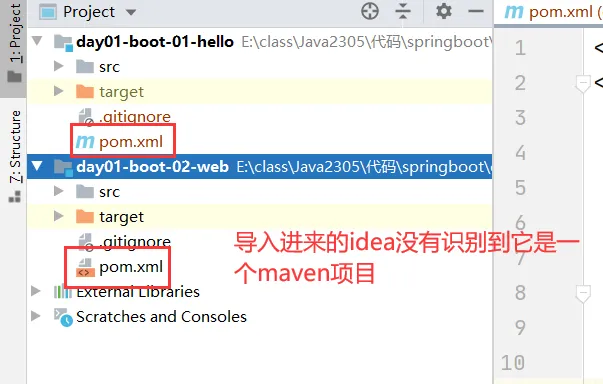
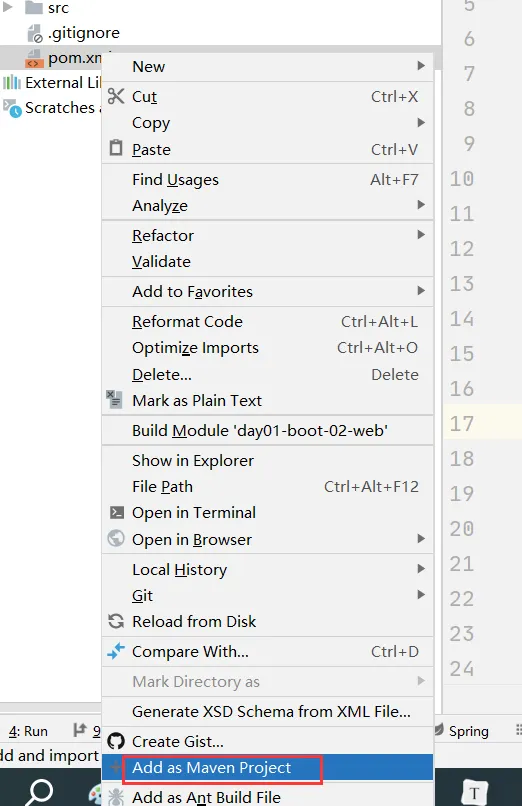
项目的复制,idea导入
定义一个Controller
0、导入springmvc依赖
1、web.xml中添加DispatchServlet
2、定义一个接口
3、里面写一个方法
4、加上一个@RequsetMapping
5、项目启动
6、浏览器访问
——SpringBoot做饭
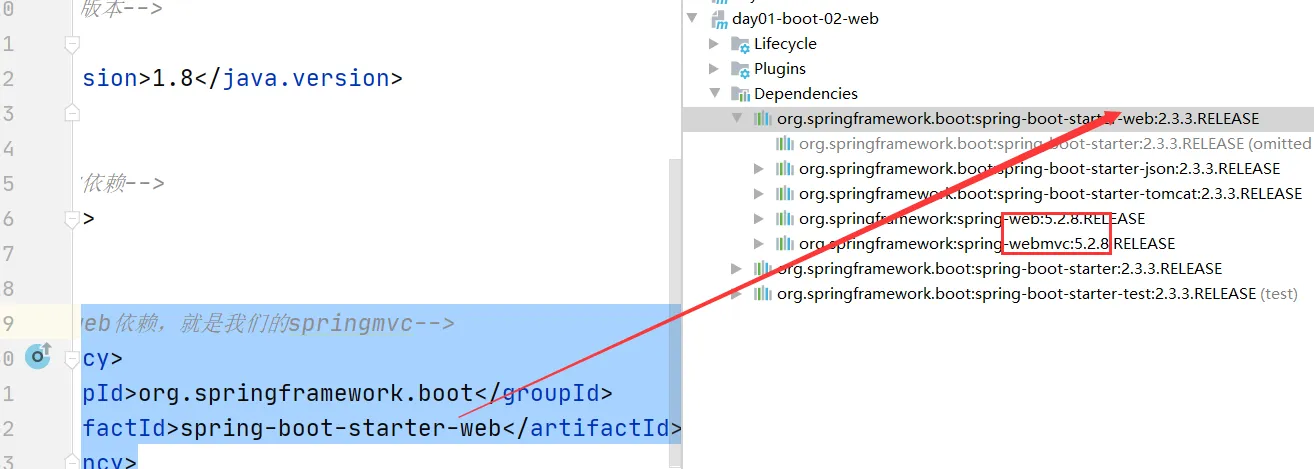
1、导入依赖
     <!-- 导入web依赖,就是我们的springmvc-->
        <dependency>
            <groupId>org.springframework.boot</groupId>
            <artifactId>spring-boot-starter-web</artifactId>
        </dependency>
2、定义接口
@RestController
public class HelloController {
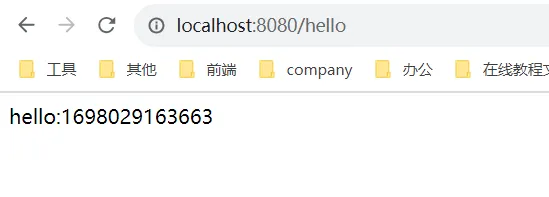
@GetMapping("/hello")
public String hello() {
return "hello:" + System.currentTimeMillis();
}
}
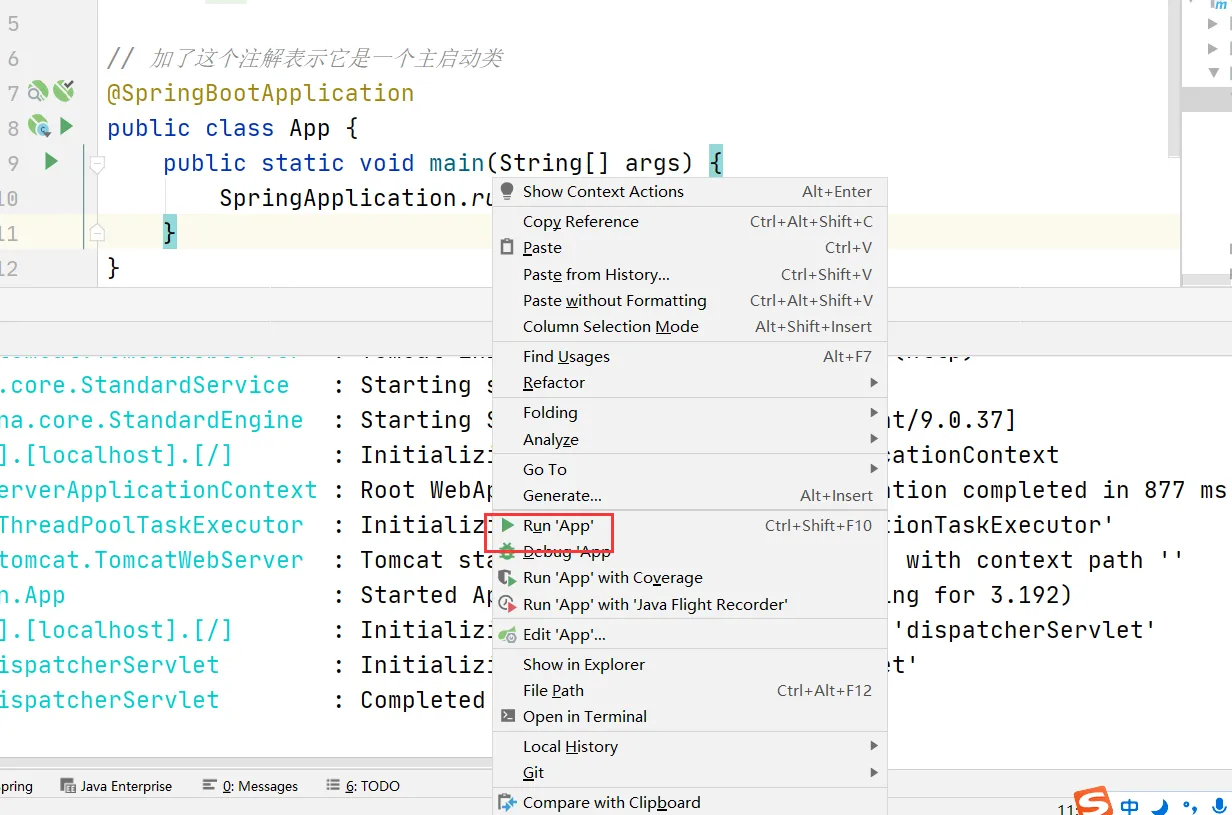
3、启动主启动类
4、测试
思考SpringBoot是怎么Controller的
1、没有在web.xml配置DIspatchServlet它是怎么找到接口的?
约定大于配置,自动转配(自动配置的),它是怎么识别的?它是扫描到了我导入了web依赖
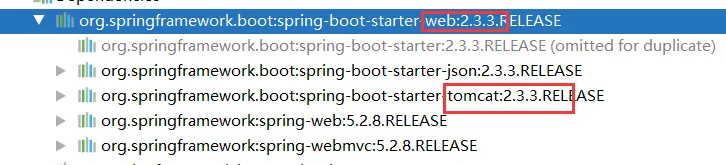
2、没有用我本地tomcat,它是怎么启动的?
web依赖的内部引入了一个tomcat依赖包,所以说的一个内置的tomcat。
3、端口是8080,怎么改啊?
默认就是8080,
4、没有开启扫描,怎么也能调用到接口?
SpringBoot默认会扫描主启动类所在的包或者它的子包。
如果需要扫描的区域不在主启动类所在的包或它的子包可以通过@ComponentScan注解指定扫描的区域。
例如:
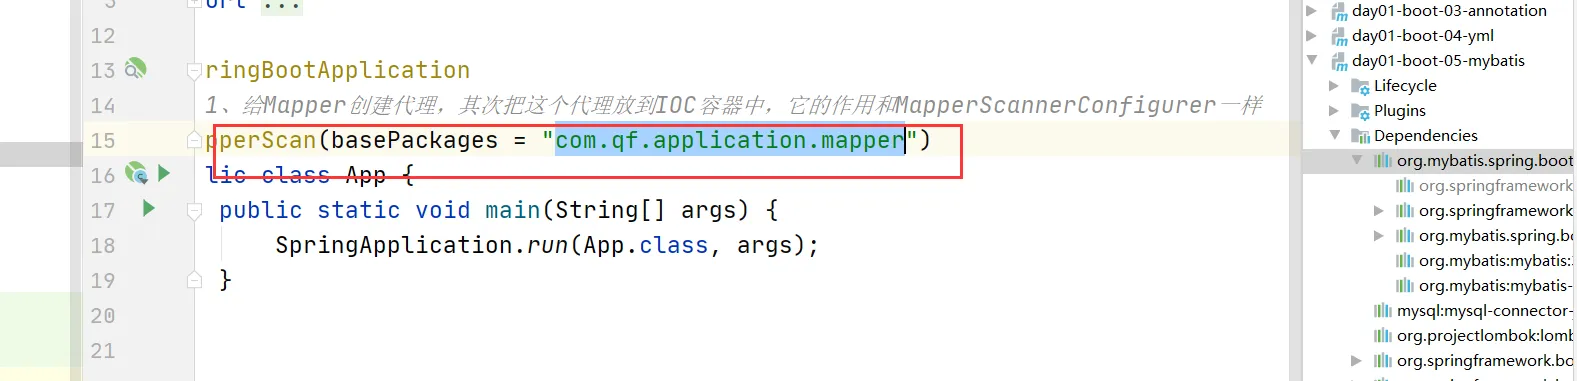
包扫描,默认扫描主启动类所在的包或者子包(@ComponentScan)
// 加了这个注解表示它是一个主启动类
@ComponentScan(basePackages = "com.qf")
@SpringBootApplication
public class App {
    public static void main(String[] args) {
        // run中传递的这个类必须要用@SpringBootApplication注解修饰
        SpringApplication.run(App.class, args);
    }
}
Boot常用注解
SpringBoot中没有XML文件,所以它是推荐使用编程式的编制。
举个列子:我要把一个user交给IOC容器管理,
XML时代:
<bean class = "com.qf.entity.User" id = "user"></bean>
编程式
@Configuration // 配置相关的类都使用该注解修饰
public class UserConfig {
    @Bean
    public Map<String,String> map(){
        Map<String,String> map = new HashMap<>();
        map.put("msg","Hello");
        return map;
    }
}
它们都是给IOC容器中添加两个user对象,
@SpringBootApplication:该注解它是修饰主启动类。
1、包扫描,默认扫描主启动类所在的包或者子包(@ComponentScan)
2、它里面也包含了编程式的配置(@Configuration)
学习方法
1、提高自己每天编码的时间
2、不要对着代码和视频去写,没有任何意义。
独立编码 –》公司。
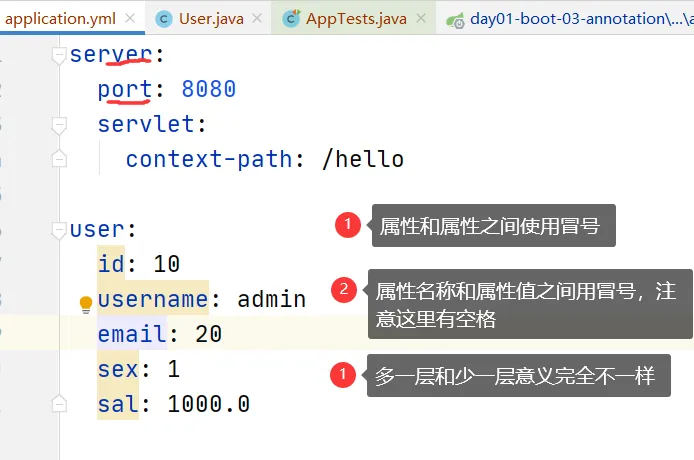
YML格式
server:
  port: 8080
  servlet:
    context-path: /hello
user:
  id: 10
  username: admin
  email: 20
  sex: 1
  sal: 1000.0
  demo: 123
  array:
    - A
    - B
    - C
  set:
    - A1
    - B2
    - C3
  list:
    - A11
    - B22
    - C33
  map:
    k1: v1
    k2: v2
    k3: v3
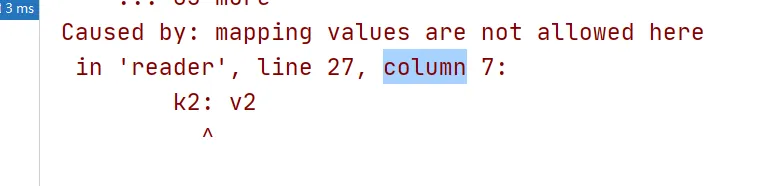
如果出现这个错误,百分之百式YML文件格式有问题。
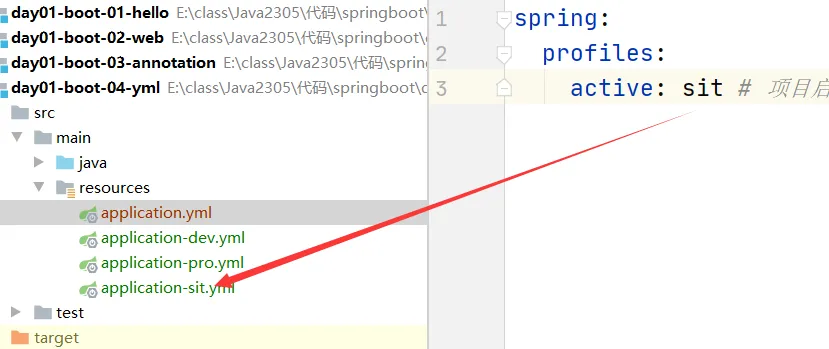
多环境的配置
在项目的实际开发中会存在很多的环境,比如:dev,sit,pro等,每个环境的都有自己的配置,我们开发人员在编码的过程中需要多次在不同的环境中进行测试,如果不做解决需要进程修改信息,所以SpringBoot提供了一个多环境的配置,给每个环境配置YML文件,然后在项目启动的时候设置读取那个环境的文件即可。
Boot整合MyBatis
回忆Spring整合MyBatis怎么干的?
1、导入依赖
2、在XMl中配置数据源,SQLSessionFactory,MapperProxy
<bean class = "MapperScannerProxy">
3、定义Mapper接口
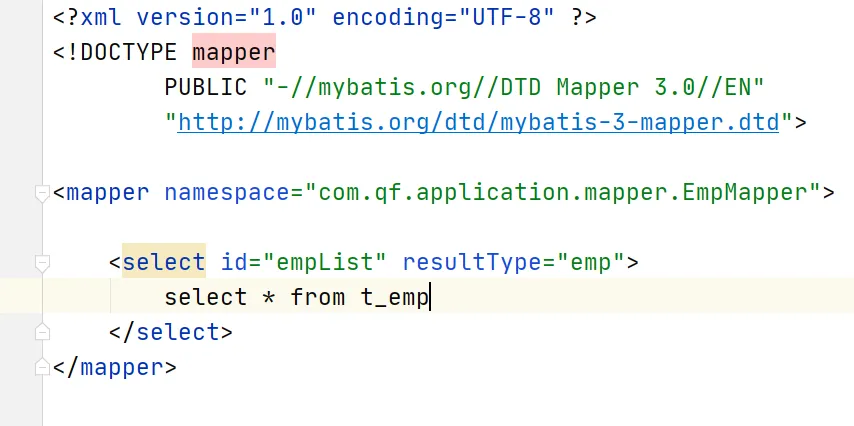
3、定义Mapper.xml,用来写SQL语句的
Boot如何整合MyBatis
1、导入依赖
        <dependency>
            <groupId>org.mybatis.spring.boot</groupId>
            <artifactId>mybatis-spring-boot-starter</artifactId>
            <version>2.2.2</version>
        </dependency>

        <dependency>
            <groupId>mysql</groupId>
            <artifactId>mysql-connector-java</artifactId>
            <version>5.1.48</version>
        </dependency>
2、YML配置
spring:
  datasource:
    url: jdbc:mysql://localhost:3306/2305-mysql
    username: root
    password: root
    driver-class-name: com.mysql.jdbc.Driver
3、MySQL脚本
-- ----------------------------
-- Table structure for `t_dept`
-- ----------------------------
DROP TABLE IF EXISTS `t_dept`;
CREATE TABLE `t_dept` (
  `deptno` int(11) NOT NULL AUTO_INCREMENT,
  `dname` varchar(14) DEFAULT NULL,
  `loc` varchar(13) DEFAULT NULL,
  PRIMARY KEY (`deptno`)
) ENGINE=InnoDB AUTO_INCREMENT=42 DEFAULT CHARSET=utf8;

-- ----------------------------
-- Records of t_dept
-- ----------------------------
INSERT INTO `t_dept` VALUES ('10', 'ACCOUNTING', 'NEW YORK');
INSERT INTO `t_dept` VALUES ('20', 'RESEARCH', 'DALLAS');
INSERT INTO `t_dept` VALUES ('30', 'SALES', 'CHICAGO');
INSERT INTO `t_dept` VALUES ('40', 'OPERATIONS', 'BOSTON');

-- ----------------------------
-- Table structure for `t_emp`
-- ----------------------------
DROP TABLE IF EXISTS `t_emp`;
CREATE TABLE `t_emp` (
  `EMPNO` int(4) NOT NULL AUTO_INCREMENT,
  `ENAME` varchar(10) DEFAULT NULL,
  `JOB` varchar(9) DEFAULT NULL,
  `MGR` int(4) DEFAULT NULL,
  `HIREDATE` date DEFAULT NULL,
  `SAL` double DEFAULT NULL,
  `COMM` double DEFAULT NULL,
  `deptno` int(11) DEFAULT NULL,
  PRIMARY KEY (`EMPNO`),
  KEY `deptno` (`deptno`)
) ENGINE=InnoDB AUTO_INCREMENT=7936 DEFAULT CHARSET=utf8;

-- ----------------------------
-- Records of t_emp
-- ----------------------------
INSERT INTO `t_emp` VALUES ('7369', 'SMITH', 'CLERK', '7902', '1980-12-17', '800', null, '20');
INSERT INTO `t_emp` VALUES ('7499', 'ALLEN', 'SALESMAN', '7698', '1981-02-20', '1600', '300', '30');
INSERT INTO `t_emp` VALUES ('7521', 'WARD', 'SALESMAN', '7698', '1981-02-22', '1250', '500', '30');
INSERT INTO `t_emp` VALUES ('7566', 'JONES', 'MANAGER', '7839', '1981-04-02', '2975', null, '20');
INSERT INTO `t_emp` VALUES ('7654', 'MARTIN', 'SALESMAN', '7698', '1981-09-28', '1250', '1400', '30');
INSERT INTO `t_emp` VALUES ('7698', 'BLAKE', 'MANAGER', '7839', '1981-05-01', '2850', null, '30');
INSERT INTO `t_emp` VALUES ('7782', 'CLARK', 'MANAGER', '7839', '1981-06-09', '2450', null, '10');
INSERT INTO `t_emp` VALUES ('7788', 'SCOTT', 'ANALYST', '7566', '1987-04-19', '3000', null, '20');
INSERT INTO `t_emp` VALUES ('7839', 'KING', 'PRESIDENT', null, '1981-11-17', '5000', null, '10');
INSERT INTO `t_emp` VALUES ('7844', 'TURNER', 'SALESMAN', '7698', '1981-09-08', '1500', '0', '30');
INSERT INTO `t_emp` VALUES ('7876', 'ADAMS', 'CLERK', '7788', '1987-05-23', '1100', null, '20');
INSERT INTO `t_emp` VALUES ('7900', 'JAMES', 'CLERK', '7698', '1981-12-03', '950', null, '30');
INSERT INTO `t_emp` VALUES ('7902', 'FORD', 'ANALYST', '7566', '1981-12-03', '3000', null, '20');
INSERT INTO `t_emp` VALUES ('7934', 'MILLER', 'CLERK', '7782', '1982-01-23', '1300', null, '10');
4、定义Mapper
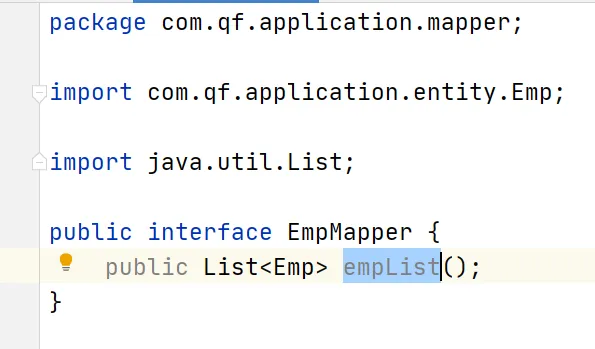
5、mybaits配置
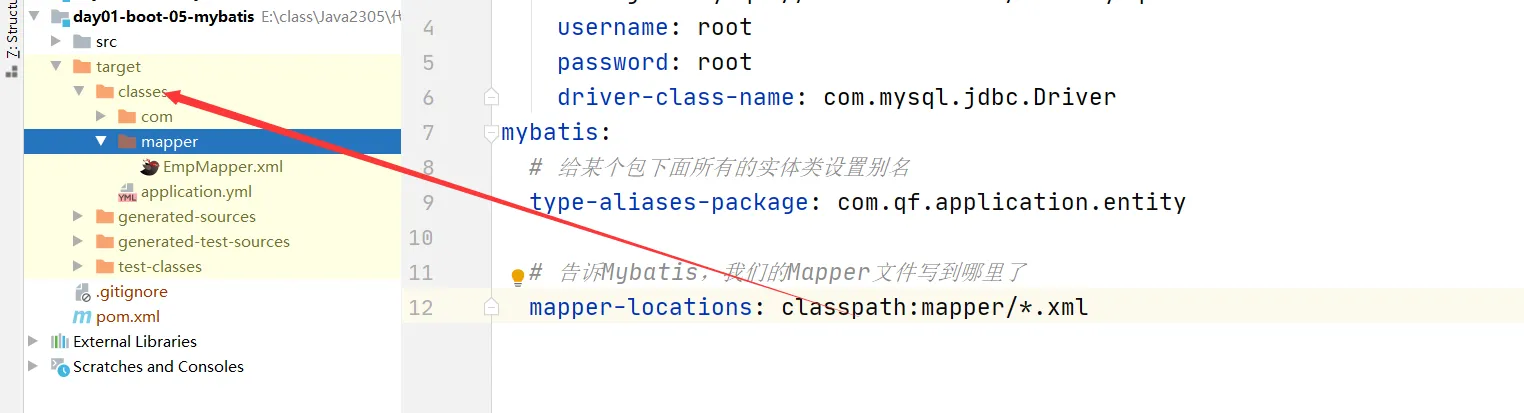
mybatis:
  type-aliases-package: com.qf.application.entity
  mapper-locations: classpath:mapper/*.xml
6、给Mappr接口创建代理
思考
配置下面两个有什么作用?

mybatis:
  # 给某个包下面所有的实体类设置别名
  type-aliases-package: com.qf.application.entity

  # 告诉Mybatis,我们的Mapper文件写到哪里了
  mapper-locations: classpath:mapper/*.xml
classPath:字节码文件的路径。
我们项目是由maven编译的,maven把所有的文件全部变异到target目录下面。
MyBaitsPlus
简称MP。
MyBaits是对JDBC的封装,可以提高开发效率。
使用Mybaits后发现每条SQL语句都需要自己来写,MP就是解决这个问题。
MP会根据ORM映射关系,自动的生成SQL语句。
userDao.insert(user) ==》ORM(对应的关系映射)
类—》表
属性–》字段
MP提供的通用的CRUD接口可以完成简单的单表操作,如果出现复杂的情况需要自己来实现。
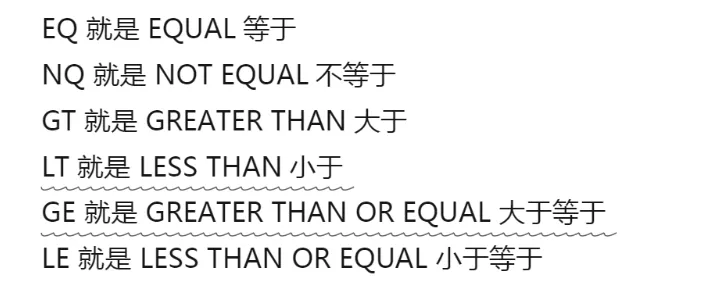
MP条件构造器
MP把简单的查询操作也封装了一下,简单的查询操作也是直接调用它的方法。
    @Test
    public void testWarpper() {
//        List<Emp> list = empService.list(); // 没有给参数查询全部

        // 1.设置查询条件
        QueryWrapper<Emp> queryWrapper = new QueryWrapper();

        queryWrapper.eq("ename","toString"); // wehre ername = 'toString'
        queryWrapper.orderByAsc("sal");
        queryWrapper.gt("sal",500);
        queryWrapper.isNotNull("comm"); // comm is not null

        // 2.查询的时候添加这个条件
        List<Emp> list = empService.list(queryWrapper);// 条件查询
        for (Emp emp : list) {
            System.out.println(emp);
        }
    }
MP 分页插件
package com.qf.application.config;

import com.baomidou.mybatisplus.annotation.DbType;
import com.baomidou.mybatisplus.extension.plugins.MybatisPlusInterceptor;
import com.baomidou.mybatisplus.extension.plugins.inner.PaginationInnerInterceptor;
import org.mybatis.spring.annotation.MapperScan;
import org.springframework.context.annotation.Bean;
import org.springframework.context.annotation.Configuration;

@Configuration
public class MybatisPlusConfig {

    /**
     * 添加分页插件
     */
    @Bean
    public MybatisPlusInterceptor mybatisPlusInterceptor() {
        MybatisPlusInterceptor interceptor = new MybatisPlusInterceptor();
        interceptor.addInnerInterceptor(new PaginationInnerInterceptor(DbType.MYSQL));//如果配置多个插件,切记分页最后添加
        return interceptor;
    }
}
作业
1、消化今天的内容
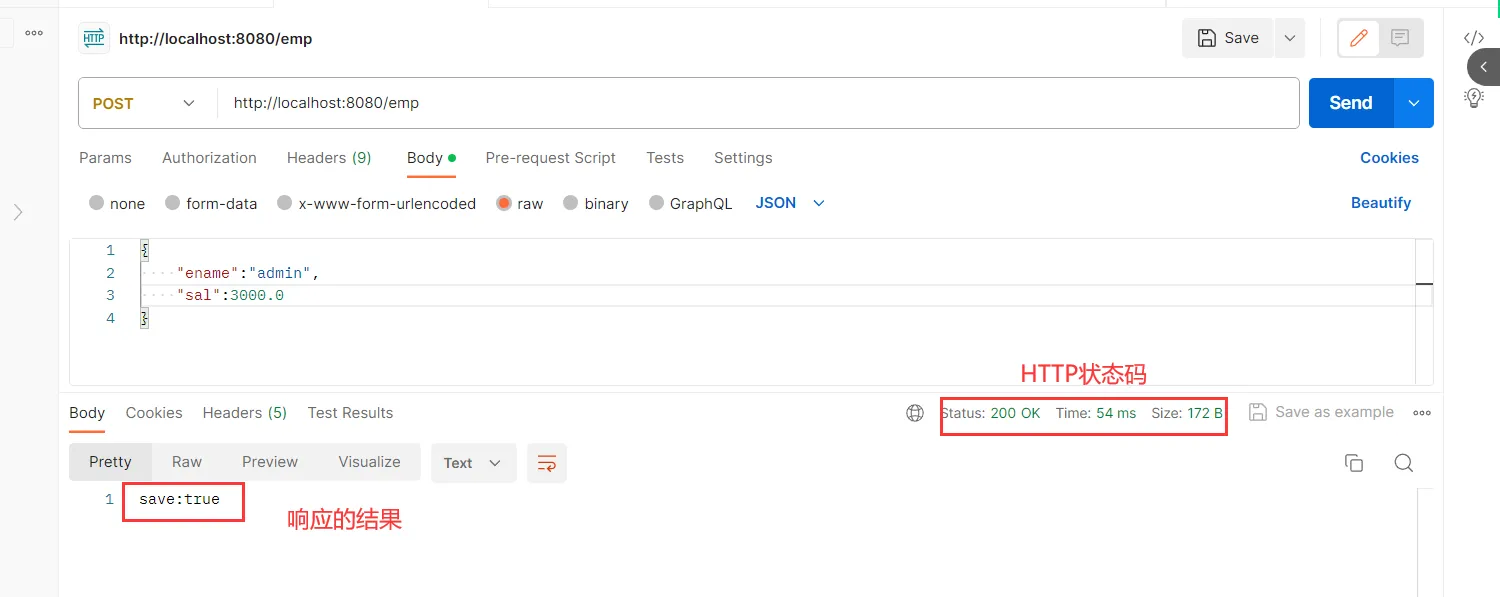
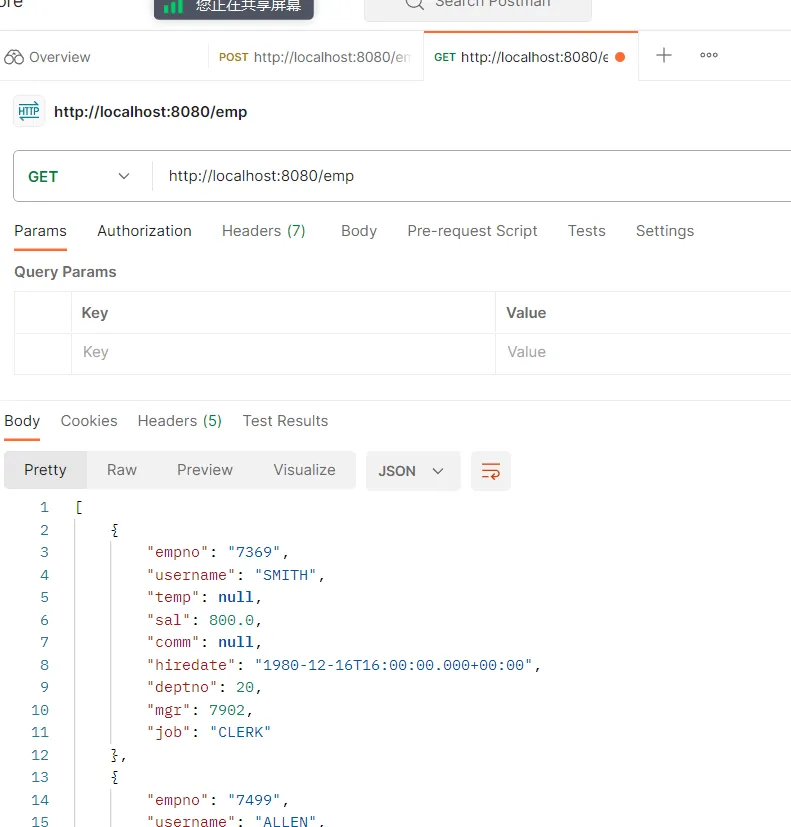
2、完成Emp和Dept表的CURD,使用Boot+MP+MySQL,只写到controller就可以了,不用写视图。
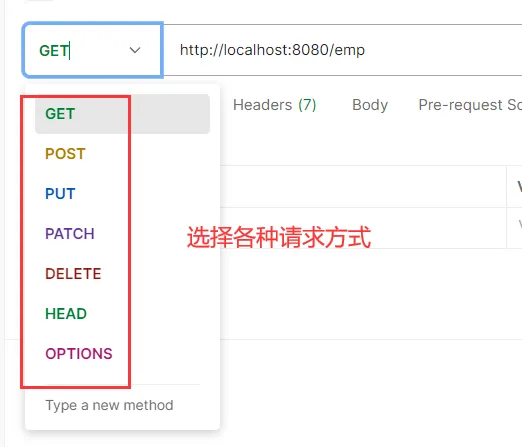
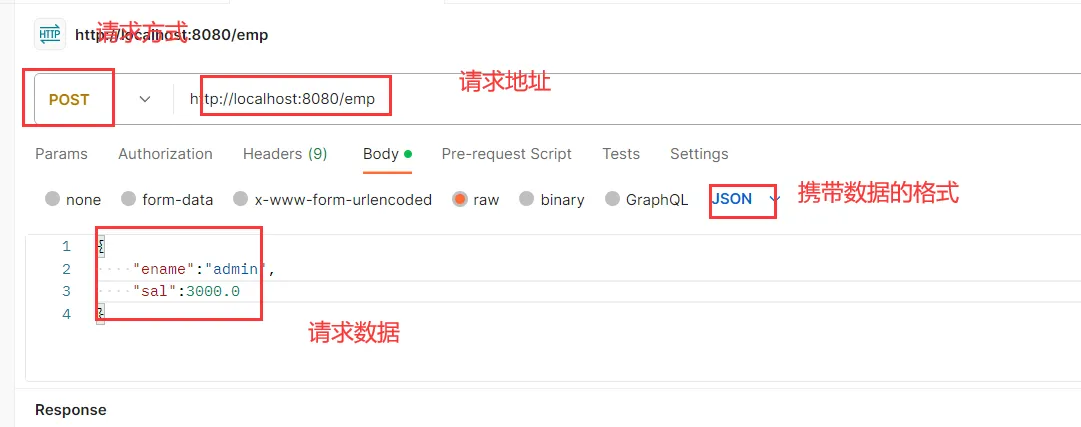
3、需要用postman测试。
4、早上提问,要求5分钟之内。
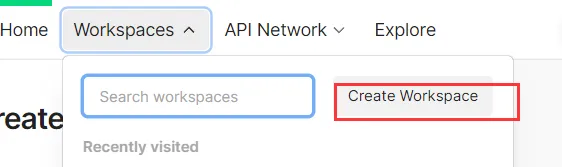
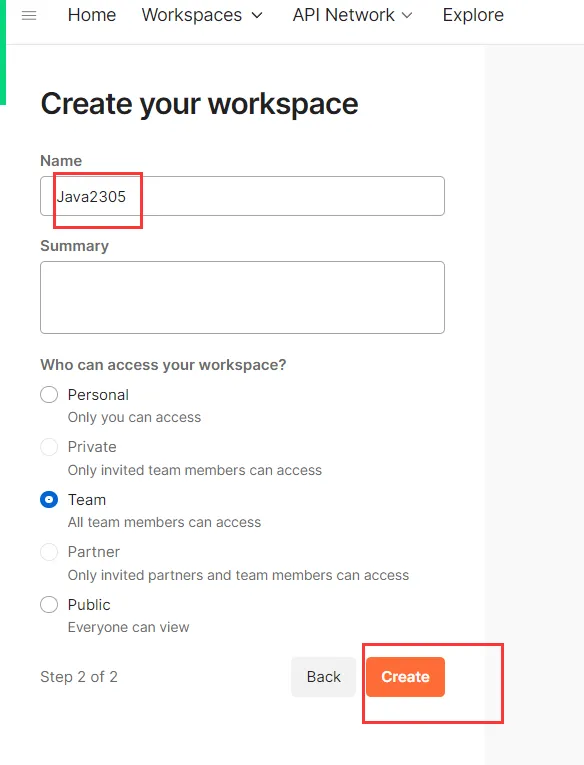
postman
https://www.postman.com/
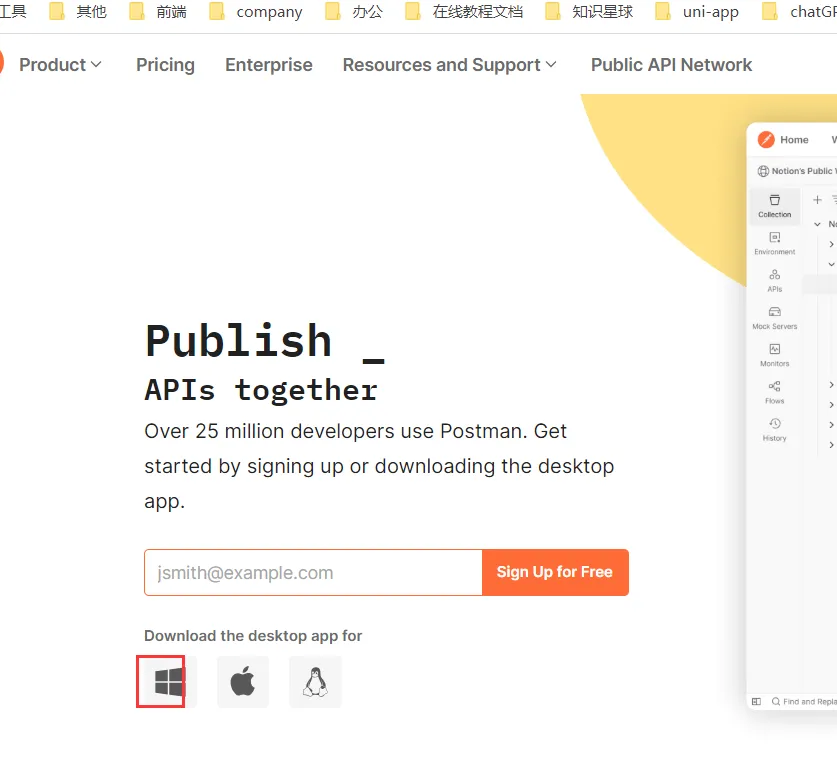
我们可以使用postman工具模拟HTTP请求。